Busy weeks, seems that we had to add a grudge to the challenge thing as my only spare month (according to the auto-imposed rules) has already been shot. But instead, I could advance in the terrain thing. So, at least, it is time for another tutorial.
I have found that preparing the scenes and making the photos while telling a story is quite enjoying. The first chapter of this story-thingy was made in a bit of a hurry but I am satisfied with the results.
I want to present each new miniature within the theme and setting up a good vignette. However, I didn't own enough terrain. Until now.
I made two types of trees. One already seen in the last photos, the second type is pre made tree and I will talk about how to base them in order to be ready for next part of the story. All of these trees are quite simple to make, they are also cheap, if you cannot afford a lot of ready-to-play scenery.
The one already seen is made with a long noodle brush, usually the soft brush to clean plumbing or vases. The other one is made of some cheap already-made trees for modelling that needs proper basing.
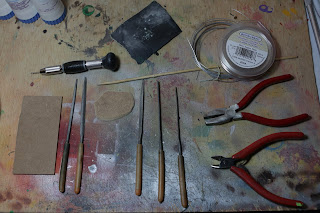
Before starting to cut the brush or glueing the modelling trees, we will need some plywood for the bases. We can cut them beforehand and make them a bevelled so they fit smoothly the tabletop. Some files and sandpapper, especially for making the base and a small hole in the middle when part of the brush wire may insert.
Wire cutters of various sizes.
We will also need for both tree types a hot glue pistol (and of course, the glue) is necessary for some parts, as we may need to keep the integrity of the brush when cutting each part.
Most of the material is easily available and probably already here and there in our workbench.
And of course, some flock for the bush tree, white/school glue and sand for making all the bases. Some brownish paintings and matt varnish are needed for painting the bases.
So...
Lets convert this long weird hair thingy into a more woody little pine tree
Type I: Brush tree
In this type of tree we will need aluminium wire for making the trunk and attaching to the base. The trunk needs some small sculpting, this can be made by various techniques and materials. I used assembly putty, for glueing to the base and sculpt the wood. But you can use any other putty at your dessire and disposal.
The final form will be made with scissors, cutting the bristles at different lengths to make the typical tree shape.
That's it, much better now.
With each cut, the brush may fall off, so we must seal the cut with a small blob of hot glue and start adding the trunk body. This part is made around the exceding wire of the brush.
We clip some aluminium wire and start twisting it. We can make some roots with parts of the aluminium wire. Also leave a small part of the original brush wires to put into the base.
We can add some of the fallen bristles to add as part of the tip that
Each base have a holw with the size of the brush wire. You can add weight to the center so the tree is balanced, but for the wire trees it may not be necessary (see below for the other type). We can glue to the base with hot glue or use the assembly putty if you are working with it. Use the hobby knife, or some toothbrush for sculpting the wood texture.
We can cut the brush with the shape of a tree like in this picture:
With the trunk sculpted and the putty cured, we can add the sand to the base keeping part of the roots exposed for painting. I prefer painting the base in this step, as we can handle the tree by the brush without damaging the "leaves" when the flock is added. After pating and adding some varnish
Then add carefully white glue watered down a little bit for all the tree shape and add the flock.
Et voilá, here they are.
Type II: Modeling trees
Try to explain this at customs
I bought a bag of this cheap trees for aprox. 12€ and they come in bags of 20 trees of various sizes. Some of them are a bit small for 28mm miniatures but can be converted to some sort of fruit tree or bushes. The advantage is that they are already made, so you can skip that part of the process, but need basing.
It is simpler than the brush tree thing. We only need to put the trunk in the hole, filed to the same size, and glue it with the assembly putty. We can sculpt some roots at the base and make it ready to add the sand and painting the base.
And in no time we have made a good bunch of trees to add to our initial set.
I must admit that while they need a little added effort, I prefer mines. It is not easy at first to make the flock stable and I may need to add another layer of glue and flock to the tree in some time. But in the end, the shape of the trunk and the color of the flock is more natural.
Though variety is better and I am quite happy with this purchase, the cheap trees were still good. And dirty cheap for 20 trees aready made.
In the future I have some more types of trees but for now, I must start with the archers and some miniatures I have prepared for the next part of the story.


No comments:
Post a Comment